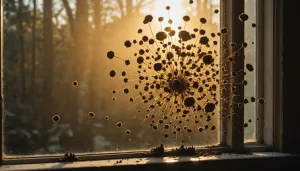
Recognizing the early signs of water damage is crucial in both preserving the structural integrity of your home and preventing costly repairs. Homeowners need to be vigilant since water damage isn’t always immediately visible and can sometimes manifest in unexpected ways. One of the most telling signs of water damage is discoloration on walls or ceilings. Often appearing as stains or patches, these discolored spots may vary in shade from light yellow to dark brown, indicating the presence of moisture that has seeped through the surface layers of your home.
Another common indicator of water damage is an unusual or musty odor. If you notice a persistent, earthy smell that lingers despite regular cleaning, it may be a sign of water infiltration and the onset of mold growth. In bathrooms, kitchens, or basements, where water usage is frequent, such smells should be promptly investigated.
Bubbling or peeling paint and wallpaper can also highlight underlying water issues. When moisture accumulates behind painted surfaces, it disrupts the adhesive properties, causing visual deformations. Similarly, warped or swollen drywall may suggest prolonged water exposure. Any noticeable pulling away of wallpaper at the seams should be regarded as a warning signal for potential water damage.
Floors aren’t immune to water damage either. Wood and laminate flooring are especially susceptible, as they tend to warp, buckle, or lift when water seeps underneath. Tiled flooring can also be affected, with loosening grout and cracked tiles being common signs. If you inspect your flooring and notice these changes, it might be time for a deeper examination.
Inspect your home’s exterior for drainage issues, keeping an eye on how water pools after rainfall. Clogged gutters, poorly directed downspouts, or mossy roof shingles can facilitate water penetration, leading to interior water damage.
Water damage in a home can vary from superficial to severe, which warrants an understanding of when transitioning from DIY fixes to professional home restoration is necessary. The table below provides a basic comparison to aid in evaluating the intensity of different water damage scenarios:
| Water Damage Indicator | DIY Tips | Professional Intervention Needed |
| Staining on walls | Apply stain-blocking primer, repaint, monitor for expansion | Identify and fix source of leak to prevent structural damage |
| Musty odors | Use dehumidifiers, increase ventilation | Mold remediation, thorough inspection to identify hidden moisture |
| Bubbling or peeling paint | Remove damaged paint, sand, repaint | Professional examination to fix underlying moisture problem |
| Warped flooring | Remove minor moisture, dehumidify area | Replace severely damaged flooring, address foundational moisture issues |
Such insights not only empower homeowners but also guide them in making an informed decision between embarking on DIY repairs or seeking professional assistance. Staying attentive to the early warning signals will enable timely interventions and, ultimately, ensure your home remains a safe and healthy living environment.
immediate diy actions
When you first identify issues, taking swift action is vital to minimize further water damage and, in some cases, even save yourself a significant amount of money on more involved repairs later. Begin by addressing the immediate problems using some straightforward DIY actions designed to help mitigate further risks.
- Stop the Source of Water:
- Identify and address the source of water exposure as quickly as possible. Locate the nearest shut-off valve if it’s a plumbing issue, or if it’s due to rain, ensure that windows, doors, and the roof are adequately sealed to prevent more water from entering.
- Remove Standing Water:
- Utilize a wet/dry vacuum to remove pools of standing water if the area is safe and the depth is manageable.
- If a vacuum is not available, use towels to soak up smaller quantities or employ a sump pump for larger volumes in basements.
- Dry Out Affected Areas:
- After removing standing water, it is crucial to dry the area thoroughly. Open windows to increase ventilation if the weather permits, and use fans and dehumidifiers to draw out moisture from the air and materials.
- If you have access to them, high-powered fans can be particularly effective in drying out large or heavily saturated areas.
- Sanitize and Clean:
- Clean affected areas with a mixture of water and bleach or appropriate cleaning agents to prevent mold and mildew from forming. Pay special attention to corners, crevices, and porous materials that could harbor growth.
- Ensure Safety:
- Turn off electrical power in areas with water to prevent shock or damage until it’s safe to check and assess electrical systems.
- Wear protective clothing if you’re dealing with potentially contaminated water, such as after flooding.
These DIY tips provide a solid foundation for initial home restoration efforts. By addressing immediate concerns effectively, homeowners can significantly reduce the potential for long-term water damage while determining the next steps in more comprehensive repairs.
assessing the scope
Understanding the extent of water damage in your home is a critical step in the restoration process. By assessing the scope, you can determine the level of intervention required and whether a DIY approach will suffice or if professional assistance is necessary. Start by examining the severity and reach of the damage. Look for variations in the moisture levels across affected areas, as this can influence the strategy you plan to implement.
Inspect visible damp spots, sagging ceilings, or dripping water. These signs may indicate more significant problems behind walls or beneath floors. Utilize a moisture meter if available; it provides an accurate assessment of water concentration in building materials like wood or drywall. Moisture meters are invaluable because they help pinpoint hidden damp areas that might not be apparent but could harbor mold or rot.
Next, consider the timeline of the water exposure. Is it recent, or has it been ongoing unnoticed? Prolonged exposure is more likely to cause structural damage and may necessitate removing and replacing damaged materials. On the other hand, quick response to fresh incidents can sometimes allow for easier remediation, such as drying and dehumidification, without needing extensive demolition or professional intervention.
Assess the material types affected. Organic materials, such as wood and carpet, are more susceptible to water absorption and subsequent damage, whereas non-porous materials like tile might simply need a thorough drying. Understanding the interaction of water with these materials will guide your remediation strategy and help you predict possible complications like mold growth.
It’s also crucial to understand the potential health risks associated with water damage, particularly if it involves contaminated water, such as that from sewage backups or natural flooding. Contaminated water not only poses a serious health threat but also dictates the level of protective measures and professional cleanup services required.
Keep documentation of your assessments. Photographs, notes, and even videos will be valuable, especially if you need to file an insurance claim or seek professional assistance. Clear documentation serves as evidence of the damage and the steps you have undertaken to address the issue, ensuring a smoother claims process.
Finally, evaluate whether your DIY skills and available resources are sufficient to manage the identified scope of damage. If the task exceeds your comfort level or the severity escalates, it may be prudent to proceed with professional services to ensure comprehensive and effective home restoration, without the risk of further damage or safety hazards. Making an informed decision at this stage can prevent escalation and ensure that your home is returned to a safe and habitable condition.
tools and materials needed
When you’re ready to tackle water damage restoration on your own, having the right tools and materials at your disposal can make all the difference in the success of your DIY efforts. Ensuring that you are well-equipped will not only expedite the process but also increase your efficiency in handling the restoration. Start by gathering essential tools, which include a wet/dry vacuum and dehumidifiers. These are crucial for removing standing water and reducing humidity levels in the affected areas, thereby preventing mold growth.
Invest in high-powered fans, as they are indispensable for air circulation and drying out walls, floors, and furnishings. A moisture meter can also prove exceedingly helpful in your toolkit. This device allows you to measure moisture levels in your home’s materials, helping you pinpoint damp spots that need attention, which might not be visible to the naked eye.
For the sanitation part of your restoration, have cleaning agents on hand. A common choice is a water and bleach solution or any mold-preventative cleaner that is safe for home use. Employing these agents is key to sanitizing surfaces and mitigating potential mold and mildew issues that can arise in moist environments.
You’ll also need a set of basic tools, such as hammers, screwdrivers, and pliers, which can aid in removing damaged materials like drywall or baseboards, giving you direct access to the areas that require repair. Protective gear shouldn’t be overlooked either—it’s crucial, particularly if you’re dealing with water that’s contaminated. Gloves, masks, and safety goggles protect you from both exposure to harmful substances and potential hazards like sharp debris.
The right materials are equally important as tools. Stock up on absorbent materials like towels or sponges for water absorption in smaller, localized areas. For larger zones, sponges and a bucket will help manage the moisture more effectively. If you find any damage to your walls or ceilings, having spare drywall, as well as waterproof sealants, will be invaluable for patching and sealing off potential points of water entry.
Sealants and waterproofing compounds are essential in reinforcing repaired areas to avoid future water damage. Look for quality products designed specifically for home restoration to ensure durability and protection against water infiltration over time.
Equipping yourself with the right tools and materials won’t just bolster your DIY efforts—it empowers you to take control of the situation, providing peace of mind as you navigate the challenges of water damage. However, remember that certain scenarios may still necessitate professional help, especially if the damage is beyond superficial repairs. Balancing proactive DIY tips with keen observation and preparedness will greatly enhance your ability to manage any water-related mishaps, maintaining a safe and sound home environment.
when to seek professional help
While DIY efforts serve as an excellent first line of defense, certain situations may call for professional intervention. It’s essential to recognize when water damage has reached a severity that exceeds your expertise or available resources. Several factors should guide your decision to seek professional help.
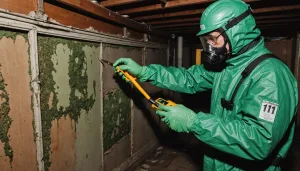
Firstly, the presence of contaminated water, such as that from sewage backups or flooding from natural disasters, poses significant health risks. Professionals have the necessary protective gear and disinfectants to safely handle and remediate contaminated environments, ensuring thorough sanitation.
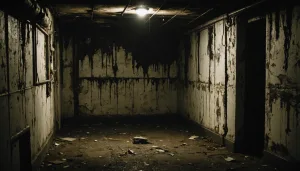
Extensive structural damage is another cue that it’s time to call in experts. If you notice damage to key structural components, such as the foundation or load-bearing walls, professional evaluation is crucial. Such issues can compromise the structural integrity of your home, requiring specialized repair techniques and materials.
Mold growth, particularly if widespread or stubborn, might also necessitate professional remediation. Mold spores can cause health issues and quickly spread, so experts will have the tools and expertise to effectively treat affected areas while advising on preventive measures to avoid recurrence.
Finally, consider the scope of your project in terms of time and cost. Water damage can rapidly escalate into a pressing and costly problem if not treated appropriately. Professionals can provide a comprehensive assessment and guaranteed service, often saving time and preventing further expense down the line.
In conclusion, water damage restoration is a task that every homeowner may face at some point. While DIY tips are invaluable for early intervention, recognizing your limits and seeking professional help when necessary can make the difference between a minor inconvenience and a major restoration project. By understanding your home’s needs and acting swiftly, you can preserve your property’s integrity and ensure a safe living environment.